Visual Studio Code Search Was Canceled Before Any Results Could Be Found Search Again
Remote development over SSH
This tutorial walks yous through creating and connecting to a virtual machine (VM) on Azure using the Visual Studio Code Remote - SSH extension. You'll create a Node.js Express web app to show how you can edit and debug on a remote machine with VS Code just like you could if the source code was local.
Notation: Your Linux VM can exist hosted anywhere - on your local host, on premise, in Azure, or in any other cloud, as long as the chosen Linux distribution meets these prerequisites.
Prerequisites
To get started, you need to have done the following steps:
- Install an OpenSSH compatible SSH client (PuTTY is non supported).
- Install Visual Studio Code.
- Have an Azure subscription (If you don't take an Azure subscription, create a free account before you begin).
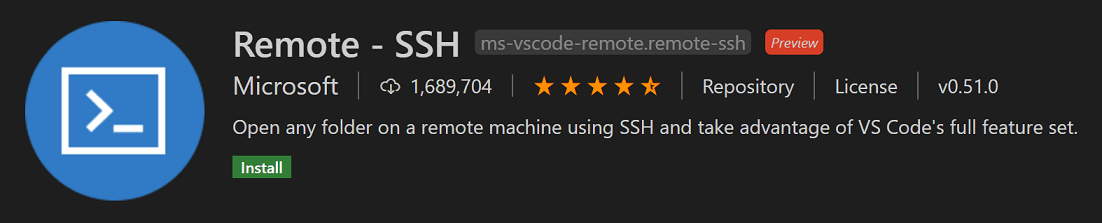
Install the extension
The Remote - SSH extension is used to connect to SSH hosts.
Install the Remote - SSH extension
Remote - SSH
With the Remote - SSH extension installed, you will encounter a new Condition bar particular at the far left.
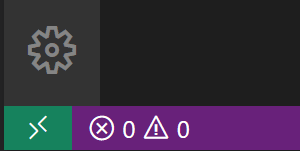
The Remote Status bar particular can quickly show you in which context VS Lawmaking is running (local or remote) and clicking on the item will bring upward the Remote - SSH commands.

Create a virtual car
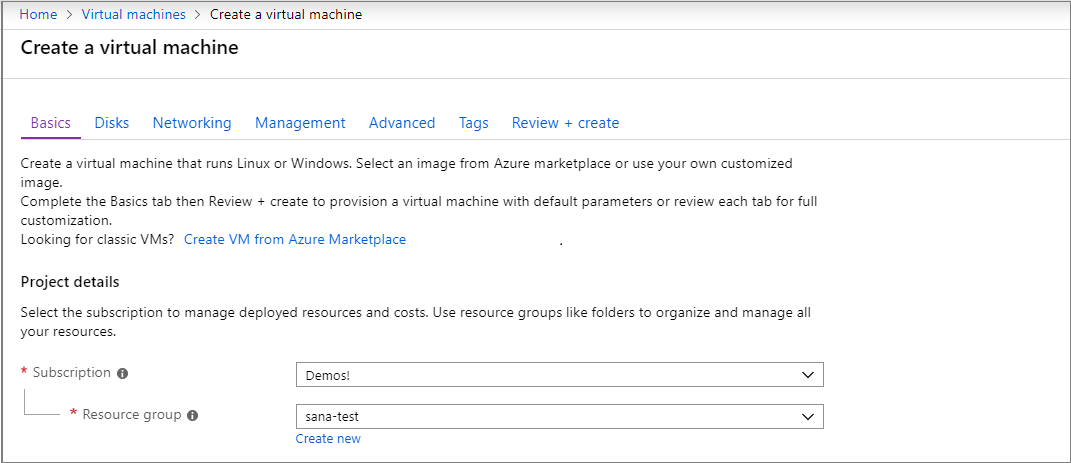
If you lot don't have an existing Linux virtual machine, you can create a new VM through the Azure portal. In the Azure portal, search for "Virtual Machines", and choose Add. From there, y'all can select your Azure subscription and create a new resource group, if yous don't already have 1.
Annotation: In this tutorial, nosotros are using Azure, but your Linux VM tin exist hosted anywhere, equally long as the Linux distribution meets these prerequisites.
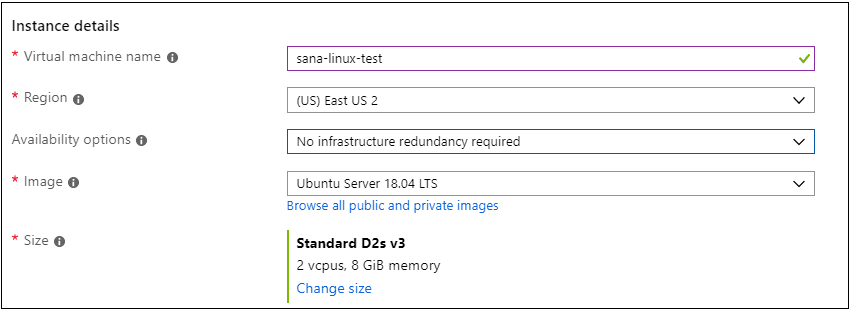
Now y'all tin can specify details of your VM, such every bit the proper name, the size, and the base image. Choose Ubuntu Server 18.04 LTS for this example, merely you tin can cull recent versions of other Linux distros and wait at VS Code'southward supported SSH servers.
Set upwardly SSH
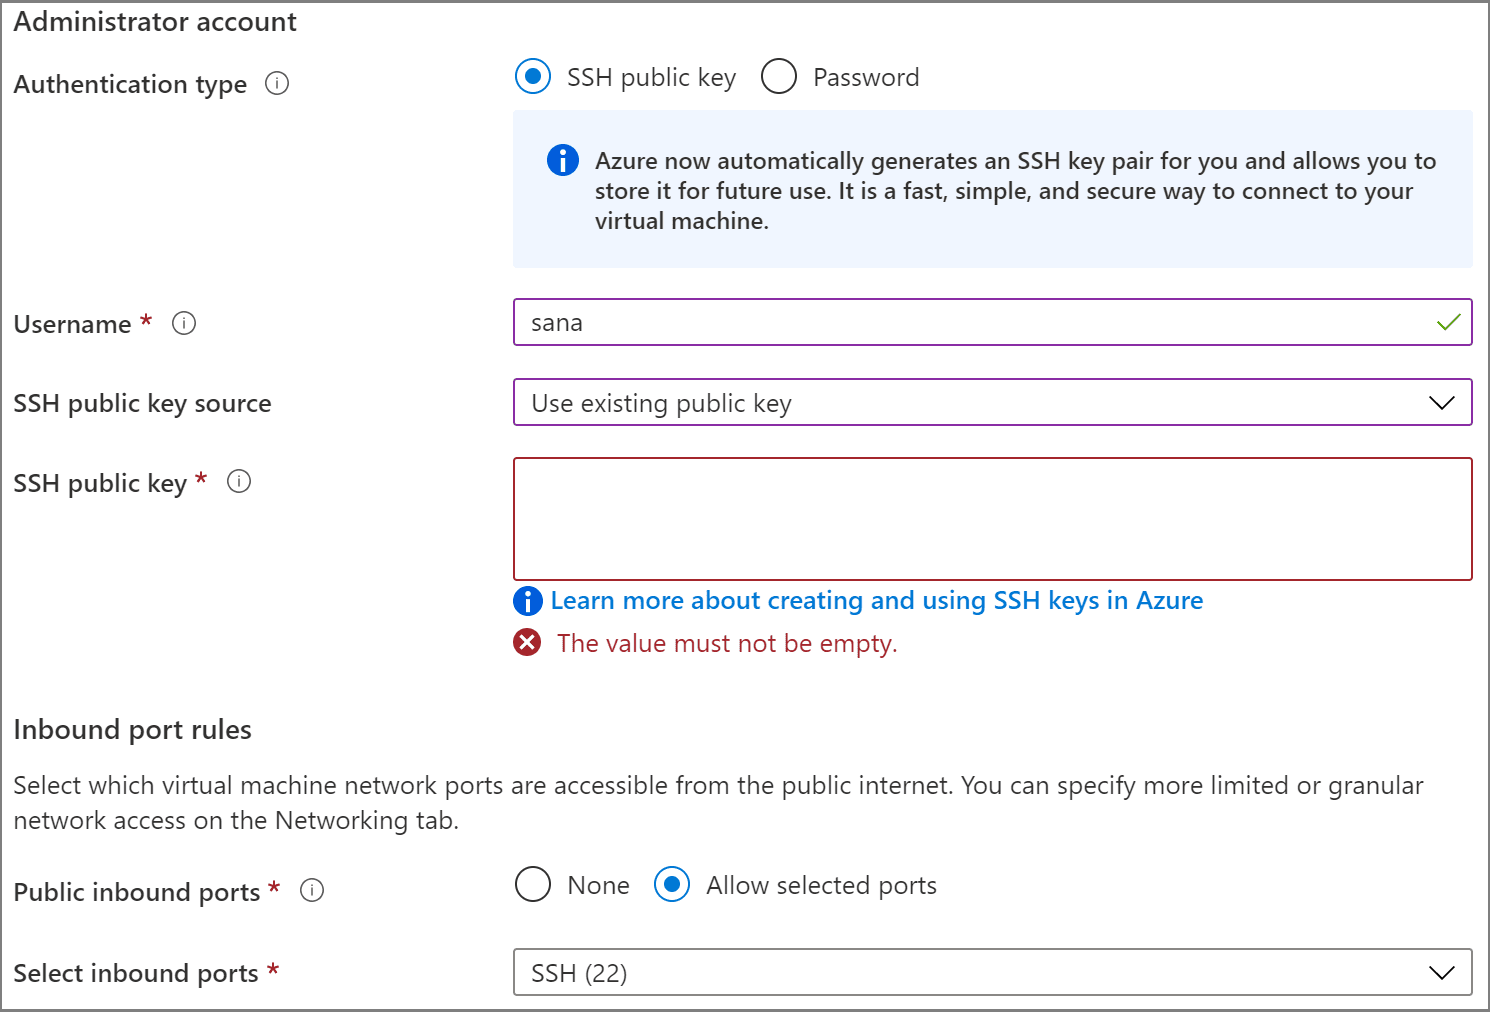
There are several authentication methods into a VM, including an SSH public/individual key pair or a username and password. Nosotros recommend using key-based authentication (if yous use a username/password, you'll exist prompted to enter your credentials more in one case by the extension). If yous're on Windows and have already created keys using PuttyGen, you tin reuse them.
Create an SSH key
If you don't have an SSH key pair, open a bash shell or the command line and blazon in:
ssh-keygen -t rsa -b 2048 This volition generate the SSH key. Press Enter at the following prompt to save the fundamental in the default location (under your user directory as a binder named .ssh).

You will then be prompted to enter a secure passphrase, but you can leave that blank. You should now have a id_rsa.pub file which contains your new public SSH primal.
Add SSH key to your VM
In the previous pace, you lot generated an SSH central pair. Select Use existing public primal in the dropdown for SSH public key source then that y'all can use the public primal you just generated. Take the public key and paste it into your VM setup, by copying the entire contents of the id_rsa.pub in the SSH public key. You also want to permit your VM to take entering SSH traffic by selecting Permit selected ports and choosing SSH (22) from the Select inbound ports dropdown listing.
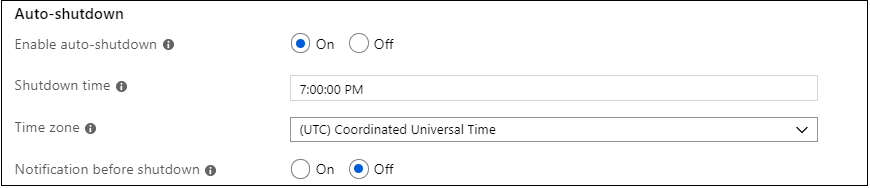
Auto shutdown
A cool feature of using Azure VMs is the ability to enable motorcar shutdown (because let's face information technology, we all forget to plough off our VMs…). If y'all become to the Management tab, yous tin ready the time yous want to close downwardly the VM daily.
Select Review and Create, and then Create, and Azure will deploy your VM for you!
Once the deployment is finished (information technology may accept several minutes), go to the new resource view for your virtual machine.
Connect using SSH
At present that you've created an SSH host, let's connect to it!
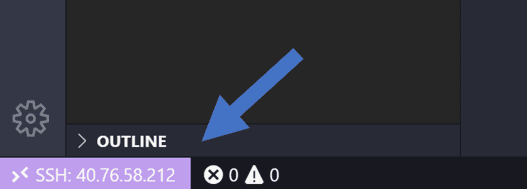
Yous'll have noticed an indicator on the lesser-left corner of the Status bar. This indicator tells you lot in which context VS Code is running (local or remote). Click on the indicator to bring upward a list of Remote extension commands.

Cull the Remote-SSH: Connect to Host command and connect to the host by entering connection data for your VM in the post-obit format: user@hostname.
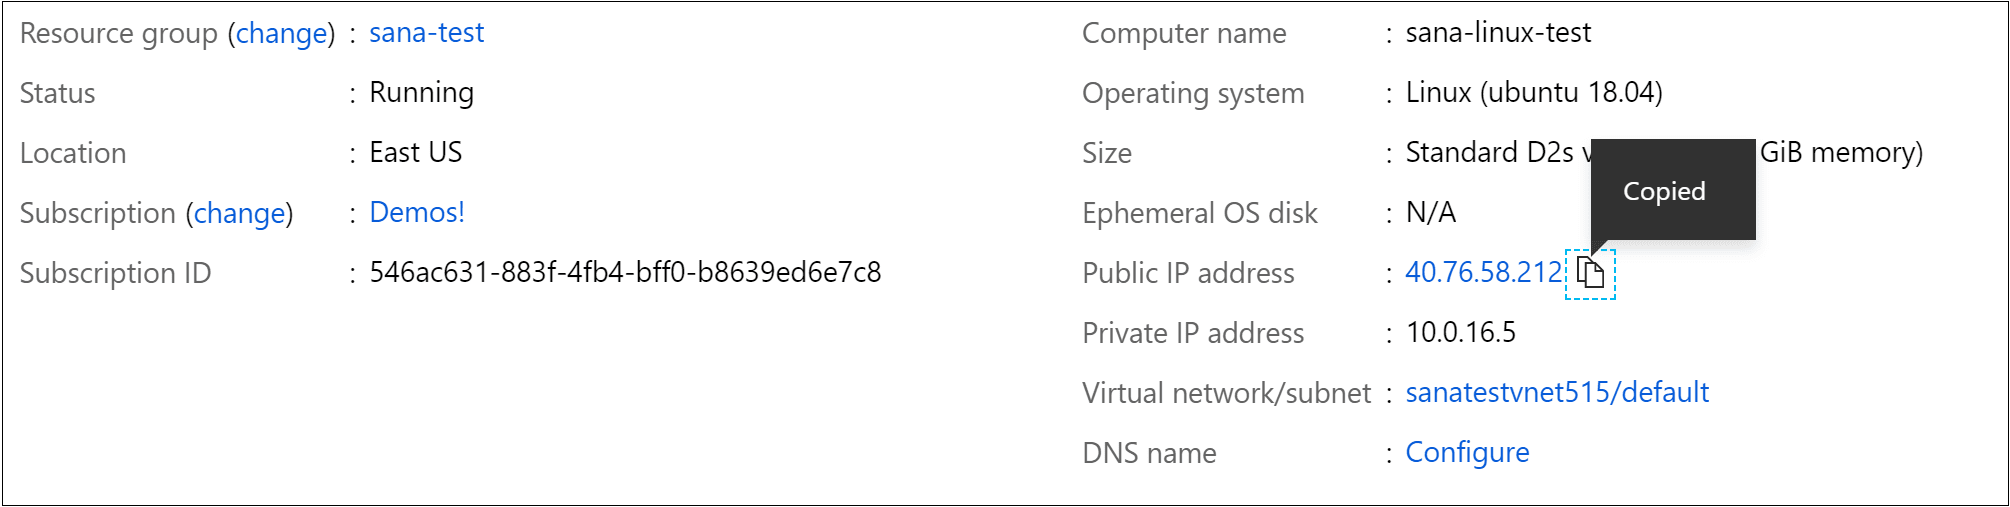
The user is the username you set up when adding the SSH public key to your VM. For the hostname, go back to the Azure portal and in the Overview pane of the VM yous created, copy the Public IP address.
Before connecting in Remote - SSH, you can verify you're able to connect to your VM via a command prompt using ssh user@hostname.
Note: If you meet an error
ssh: connect to host <host ip> port 22: Connection timed out, you may need to delete NRMS-Dominion-106 from the Networking tab of your VM:

Ready the user and hostname in the connection information text box.

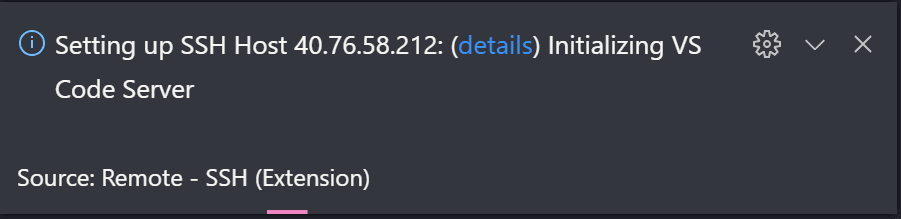
VS Code will at present open a new window (example). You'll then run into a notification that the "VS Lawmaking Server" is initializing on the SSH Host. Once the VS Code Server is installed on the remote host, it can run extensions and talk to your local instance of VS Lawmaking.
You'll know you lot're connected to your VM by looking at the indicator in the Status bar. It shows the hostname of your VM.
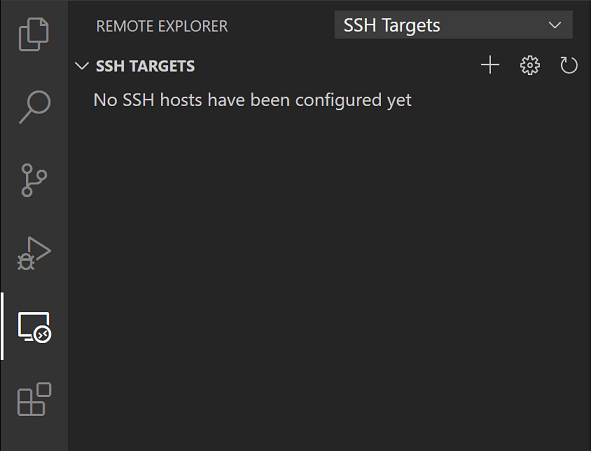
The Remote - SSH extension too contributes a new icon on your Activity bar, and clicking on it will open up the Remote explorer. From the dropdown, select SSH Targets, where you can configure your SSH connections. For case, you can relieve the hosts you connect to the most and access them from here instead of inbound the user and hostname.
Once you lot're connected to your SSH host, you tin can interact with files and open folders on the remote machine. If you open the integrated terminal ( ⌃` (Windows, Linux Ctrl+`)), you'll see y'all're working inside a fustigate crush while you're on Windows.

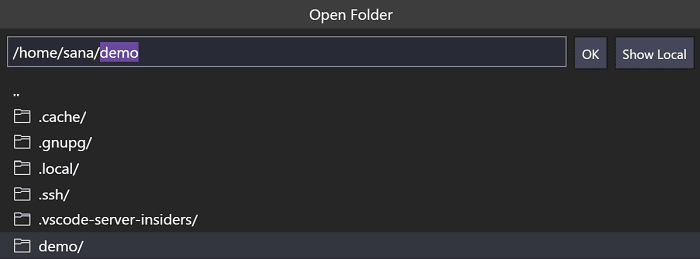
You can use the bash beat to browse the file arrangement on the VM. Y'all can as well browse and open folders on the remote home directory with File > Open up Folder.
Create your Node.js application
In this footstep, y'all will create a uncomplicated Node.js application. You lot will use an application generator to quickly scaffold out the awarding from a terminal.
Install Node.js and npm
From the integrated final ( ⌃` (Windows, Linux Ctrl+`)), update the packages in your Linux VM, then install Node.js, which includes npm, the Node.js package manager.
sudo apt-become update curlicue -sL https://deb.nodesource.com/setup_lts.x | sudo -E bash - sudo apt-get install -y nodejs You can verify the installations by running:
node --version npm --version Install the Express generator
Express is a pop framework for building and running Node.js applications. You can scaffold (create) a new Limited application using the Express Generator tool. The Express Generator is shipped as an npm module and installed by using the npm command-line tool npm.
sudo npm install -1000 express-generator The -yard switch installs the Express Generator globally on your machine so that you can run it from anywhere.
Create a new application
You can now create a new Express awarding called myExpressApp by running:
limited myExpressApp --view pug The --view pug parameters tell the generator to use the pug template engine.
To install all of the awarding'southward dependencies, go to the new folder and run npm install.
cd myExpressApp npm install Run the application
Terminal, permit'south ensure that the application runs. From the last, start the awarding using the npm start command to beginning the server.
npm kickoff The Express app by default runs on http://localhost:3000. You won't see annihilation in your local browser on localhost:3000 considering the web app is running on your virtual machine.
Port forwarding
To be able to browse to the spider web app on your local machine, you can leverage some other feature called Port forwarding.
To be able to admission a port on the remote machine that may not exist publicly exposed, you need to establish a connection or a tunnel betwixt a port on your local automobile and the server. With the app still running, open the SSH Explorer and find the Forwarded Ports view. Click on the Forward a port link and indicate that you want to forward port 3000:

Name the connectedness "browser":

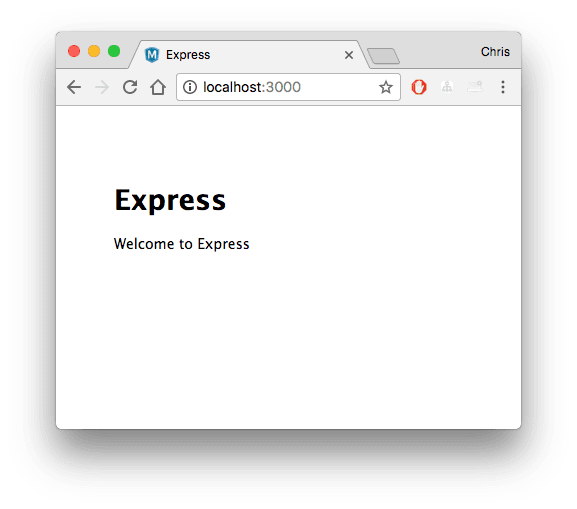
The server will at present frontward traffic on port 3000 to your local auto. When you browse to http://localhost:3000, you lot see the running web app.
Edit and debug
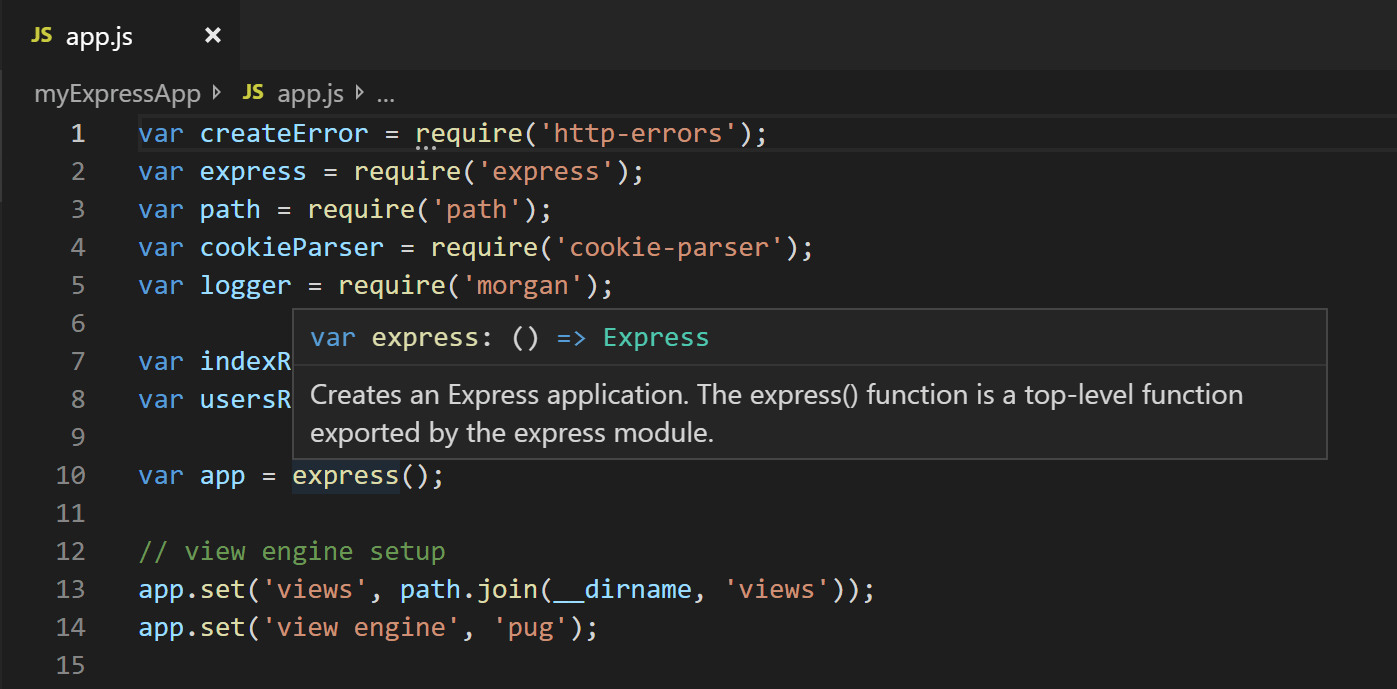
From the Visual Studio Code File Explorer ( ⇧⌘E (Windows, Linux Ctrl+Shift+Due east)), navigate to your new myExpressApp folder and double-click the app.js file to open it in the editor.
IntelliSense
You take syntax highlighting for the JavaScript file as well as IntelliSense with hovers, just like yous would see if the source code was on your local machine.
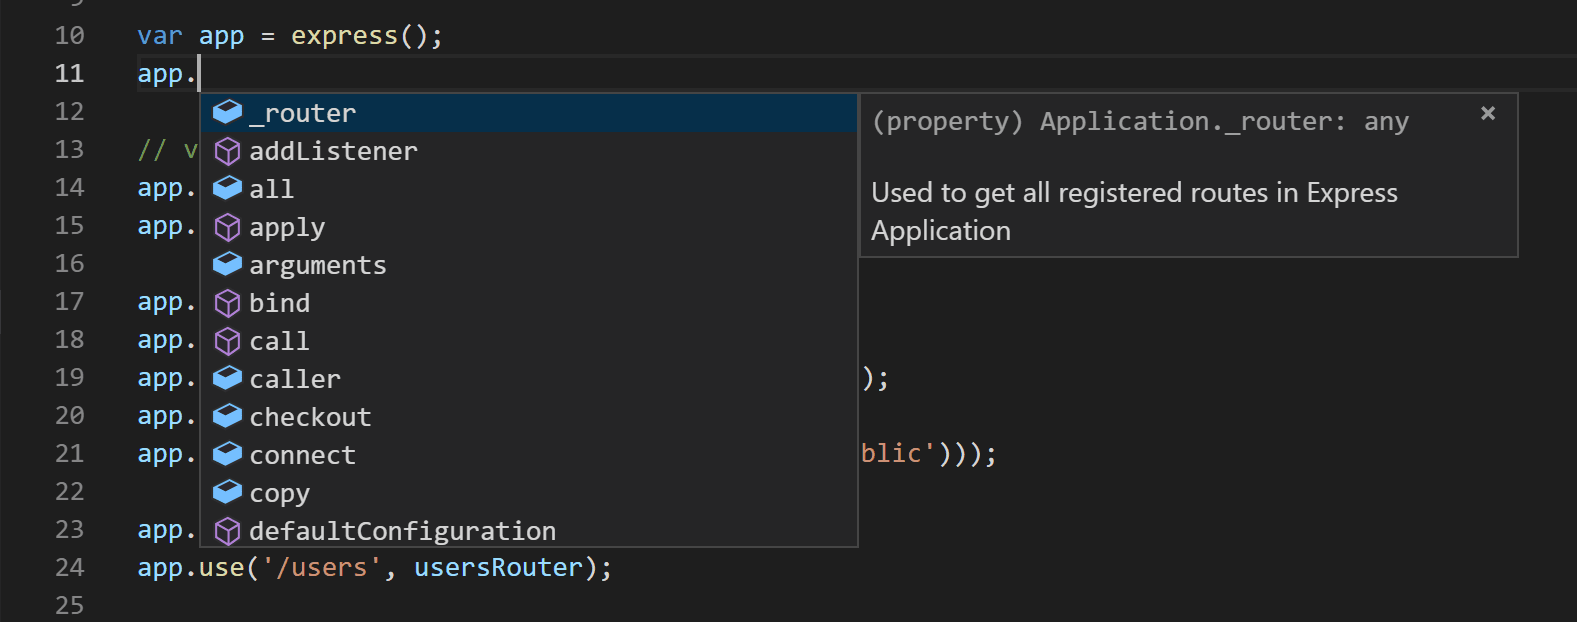
When yous showtime typing, you'll get smart completions for the object methods and properties.
Debugging
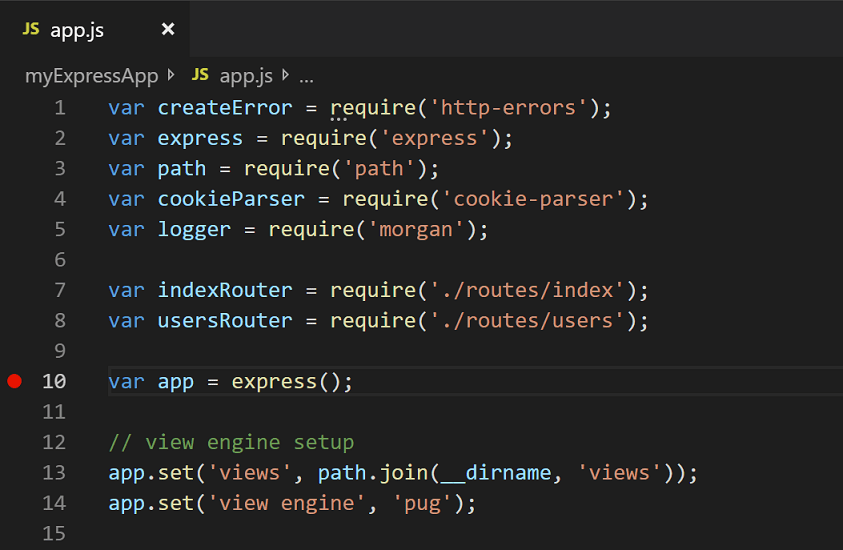
Set a breakpoint on line 10 of app.js by clicking in the gutter to the left of the line number or by putting the cursor on the line and pressing F9 . The breakpoint volition be displayed as a scarlet circumvolve.
Now, press F5 to run your application. If you are asked how to run the application, choose Node.js.
The app will start, and you'll hitting the breakpoint. You can inspect variables, create watches, and navigate the call stack.
Press F10 to stride or F5 again to end your debugging session.

You get the full development experience of Visual Studio Code connected over SSH.
Ending your SSH connection
You can end your session over SSH and go back to running VS Code locally with File > Close Remote Connexion.
Congratulations!
Congratulations, you've successfully completed this tutorial!
Next, cheque out the other Remote Evolution extensions.
- Remote - WSL
- Remote - Containers
Or go them all by installing the Remote Development Extension Pack.
Source: https://code.visualstudio.com/docs/remote/ssh-tutorial
Publicar un comentario for "Visual Studio Code Search Was Canceled Before Any Results Could Be Found Search Again"